
Pirat Ship Diorama - Step-by-Step

Today it will be unusually. There will be a tutorial from creating a small pirate ship diorama. The project was so interesting from the very idea that I decided to prepare a small step-by-step. My good friend Bartek asked me to prepare stand for the model of pirate orka from Black Sailor. Without a moment's thought, I accepted this commision, because Bartek didn't create this work for himself, but for his friend as a gift. The more I wanted to contribute to something like that.
Dzisiaj będzie nietypowo. Będzie tutorial z tworzenia małej dioramy statku pirackiego. Projekt był na tyle ciekawy z samego pomysłu, że postanowiłem przygotować niewielki step-by-step. Mój dobry znajomy Bartek poprosił mnie abym przygotował mu ciekawą podstawkę pod model pirackiego orka z Black Sailor'a. Bez chwili zastanowienia przyjąłem to zlecenie, ponieważ Bartek nie tworzył tej pracy dla siebie, a dla swojego przyjaciela jako prezent. Tym bardziej chciałem mieć swój wkład w coś takiego.
It was difficult, because I didn't have a model at my workshop. I got photos from Bartek with a dimensions. It was a kind of challenge to match diorama with the model prepared by someone else. As we agreed on the basic issues, it was time for a simple drawing of the project.
Najtrudniej było zabrać się do tego nie posiadając modelu. Od Bartka otrzymałem fotki ze zwymiarowanym modelem, i radź sobie Pan :D Nie powiem bo jest to swego rodzaju wyzwanie, aby całość była spójna z modelem przygotowywanym przez kogoś innego. Ustaliliśmy z Bartkiem czego mamy unikać przy malowaniu aby nie zepsuć rozłożenia światła. Jak dogadaliśmy podstawowe sprawy, to przyszedł czas na proste wyrysowanie projektu.
I created a quick sketch of the ship's section with balustrade and ropes, but it was not enough. I decided to create something that I hadn't done before, i.e. a high diorama ship with the upper and lower deck. Bartek liked this idea very much, so I set to action.
Na szybko stworzyłem rysunek wycinku statku z balustradą i linkami, ale jakoś za mało tego było. Postanowiłem, że stworze coś czego wcześniej nie robiłem, czyli wysoką dioramkę statku z pokładem górnym i dolnym. Pomysł ten bardzo spodobał się Bartkowi więc zabrałem się do działań.

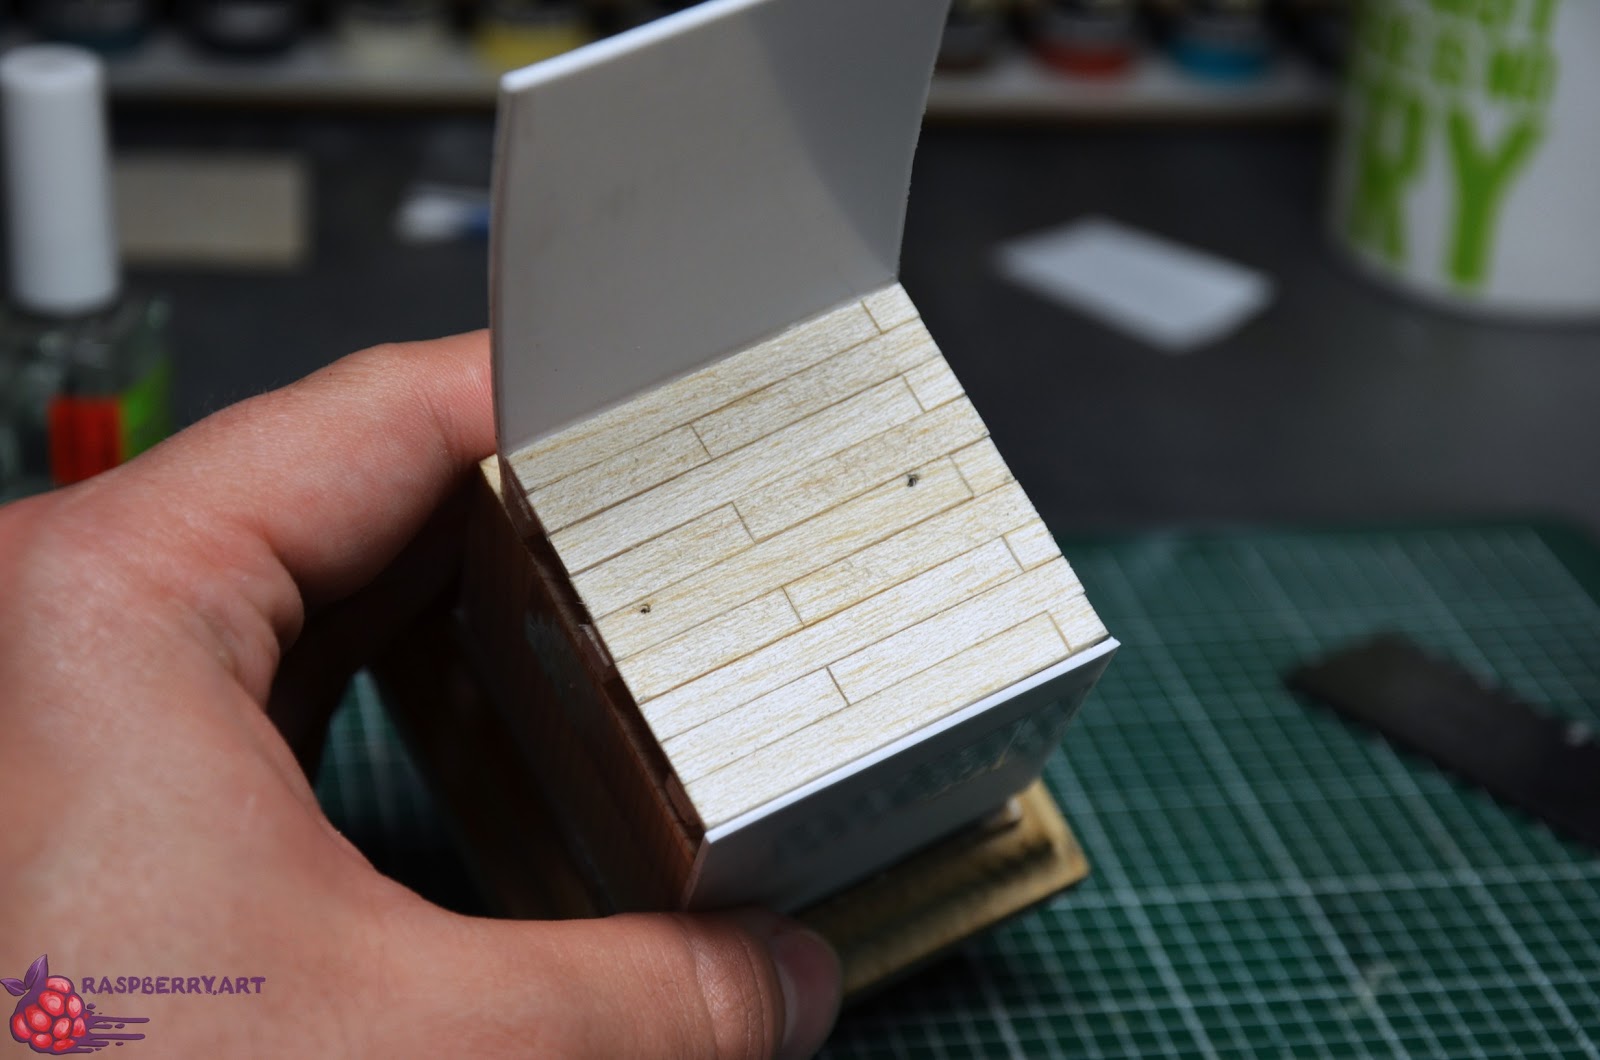
I finished the schematic drawing. I drew the balsa cut lines. I started from the flat surfaces, i.e. the upper deck, the lower deck ceiling and the bottom deck floor. To create the whole I used different plasticard thicknesses and thin balsa boards, as well as balsa in the shape of a profile. If I was creating the whole balsa construction, it would not be stiff enough to be able to work with it. That's why I placed plasticard plates under every wooden element.
Dopracowałem schematyczny rysunek, naniosłem na nim cięcie balsy w odpowiednich miejscach i zacząłem tworzyć szkielet. Wystartowałem od płaskich powierzchni, czyli pokładu górnego, sufitu dolnego pokładu i posadzki dolnego pokładu. Do stworzenia całości użyłem różnych grubości plasticardu oraz cienkich desek balsy, a także balsy w kształcie profilu. Jeżeli tworzył bym całą konstrukcję z balsy, nie było by to na tyle sztywne aby można było z tym pracować. Dlatego pod każdy drewniany element leciało plasticardowe wzmocnienie.


All the boards were cut to the right length, the plasticard was sanded with sand paper, so that the wooden glue binding the plastic deck had something to stick to. It is true that this method isn't entirely perfect, because here and there I had to use drastic methods in the form of cyanoacryl.
Wszystkie deski zostały wycięte na odpowiednie długości, plasticard został przeszlifowany gruboziarnistym papierem, aby wikol wiążący deski pokładu z plastikiem miał się czego trzymać. Co prawda ta metoda nie jest do końca idealna, ponieważ gdzieniegdzie musiałem zastosować drastyczniejsze metody w postaci cyjanoakrylu.


I added the surface elements prepared in this way to the balsa profiles in order to create the impression of cross beams in the structure of the ship. In order for the whole to have its proper place on the plinth, I had to add two pins so that the pin passed through the plasticard but didn't pass through the bottom deck.
Tak przygotowane elementy płaszczyzn dokleiłem do balsowych profili w celu stworzenia wrażenia belek poprzeczny w strukturze statku. Aby całość miała swoje odpowiednie miejsce na plincie zapinowałem dwa miejsca tak aby pin przeszedł przez plasticard, ale nie wystawał przez deski pokładu dolnego.


Another important element was the creation of the curvature of the ship. To this, I cut a suitably long piece of plasticard, and then tried to bend it at the right angle. To do this, I heated the material with a dryer and on the edge of the table, I slightly bent such a plastic element. Then the whole thing landed in cold water to harden the plastic.
Kolejnym istotnym elementem było stworzenie krzywizny statku. W tym celu wyciąłem odpowiednio długi kawałek plasticardu, a następnie starałem się wygiąć go pod odpowiednim kątem. Aby to zrobić wygrzałem materiał suszarką i na krawędzi blatu taki plastyczny element delikatnie wyginałem. Następnie całość wylądowała w zimnej wodzie, aby zahartować plastik.


Having the outer part of the ship, I glued it to the lower deck to start building the upper deck. I have set the right height of the lower deck and created supports to make the whole thing resist (I had not idea how much the orc model weighed). I was afraid that the balsa profile wouldn't be strong enough. I decided to strengthen it. I drilled it gently through it and placed a thicker wire in the middle, which additionally passed through the lower deck and anchored in the plinth, and gently passed through the whole top, but didn't pass through the boards. It was stiff now.
Mając już zewnętrzną część statku przykleiłem ją do dolnego pokładu aby zacząć budować górny dek. Wyznaczyłem sobie odpowiednią wysokość dolnego pokładu i stworzyłem podpory, aby całość miała się na czym oprzeć (nie miałem pojęcia ile ważył model). Obawiałem się, że balsowy profil nie będzie wystarczająco wytrzymały. Postanowiłem, że go wzmocnie. Przewierciłem go delikatnie na wylot i umieściłem w środku grubszy drut, który dodatkowo przechodził przez dolny dek i kotwiczył się w plincie, oraz delikatnie przechodził przez całość górnego deku, ale nie przechodził przez deski. Teraz było już sztywno.


I made a few beams creating a makeshift reinforcement at the ceiling, and then I cut out the appropriate board length and glued the inside of the ship. I did the same with the outer side of the ship later, but this is at a later stage.
Dorobiłem kilka belek tworząc przy suficie prowizoryczne wzmocnienia, a następnie wyciąłem odpowiedniej długości decki i wykleiłem wnętrze statku. To samo zrobiłem później z zewnętrzną stroną statku, ale to w dalszym etapie.


I already had a bottom made and partly top. To make the upper deck look more interesting, I created a wooden frame (I have no idea what it's called). It was quite an annoying job, but in the end I'm glad that I decided on such an element.
Miałem już dół zrobiony i częściowo górę. Aby górny pokład wyglądał ciekawiej stworzyłem taką drewnianą kratkę (nie mam pojęcia jak to się nazywa). Był to dość upierdliwa robota, ale ostatecznie jestem zadowolony, że zdecydowałem się na taki element.


The time has come to make a railing. I didn't have too much idea here and I don't hide that I went to the easy way. A gentle lift from a thick piece of balsa, glued to the outside of the ship. I glued the thicker slats to go beyond the thickness of the standard boards. After the glue has dried, I rounded the corners with sandpaper. Then, at regular intervals, I was able to beat the toothpicks previously cut to the appropriate length and glue them. I created the final handrail from a thicker piece of balsa, glued the toothpick from underneath and sanded the corners rounding them.
Przyszedł czas na zrobienie balustrady. Tutaj nie miałem za bardzo pomysłu i nie ukrywam, że poleciałem po najmniejszej linii oporu. Paronasto milimetrowe podwyższenie z grubego kawałka balsy, przykleiłem równając do zewnętrznej części statku. Na to przykleiłem grubszawe listewki, aby wyszły poza grubość standardowych deseczek. Po wyschnięciu kleju zaokrągliłem narożniki papierem ściernym. Następnie w równych odstępach powbijałem wykałaczki wcześniej przycięte na odpowiednią długość i przykleiłem. Ostateczną poręcz stworzyłem z grubszego kawałka balsy, przykleiłem od spodu wykałaczki i przeszlifowałem narożniki zaokrąglając je.


If I think about a pirate ship, I have hundreds of ropes right in front of my eyes creating a great chaos that surprisingly people can understand. I wanted to create such ropes in this project so that the theme of diorama would be easier to read. For this purpose, I bought thin steel wire and a thicker stiff wire. With the help of a drill, I connected both wires together to form a ship's ropes. We managed to make 3 longer sections, which I connected with thinner ropes across. I cut a piece of balsa, sanded the corner and attached ropes to it. I was happy with the effect, though only after the preshadingu had been placed.
Jeżeli myślę o statku pirackim to od razu przed oczami mam setki linek tworzących wielki chaos, który o dziwo ludzie potrafią ogarnąć. Chciałem i w tym projekcie stworzyć takie linki, aby odczyt dioramy był jednoznaczny. Do tego celu kupiłem cieniutkie stalowe druciki oraz grubszy sztywny drut. Za pomocą wiertarki splotłem ze sobą oba druty tworząc line okrętową. Udało się zrobić 3 dłuższe odcinki, które połączyłem cieńszymi linami w poprzek. Wyciąłem kawałek balsy, przeszlifowałem narożnik i dokleiłem do niego linki. Byłem zadowolony z efektu, choć dopiero po położeniu preshadingu.


When it comes to building dioramas, this is the end here. Unfortunately, I don't have step-by-step painting, because I didn't know how it would work out. Next I used some bits and other staff. Boxes, barrels and bags are from Mini Monsters - I recommend it! I orderd the small rats from Germany because I liked them the most - JonSmith Modellbau.
Jeżeli chodzi o budowę dioramy to tutaj jest koniec. Niestety nie mam step-by-stepu z malowania, bo sam nie wiedziałem jak to wyjdzie. Dalej korzystałem już z bitsów i dostępnych rzeczy. I tak, skrzynki, beczki i worki są od Mini Monsters - polecam! Natomiast szczurki ściągałem specjalnie z Niemiec bo najbardziej mi przypadły do gustu - JonSmith Modellbau.


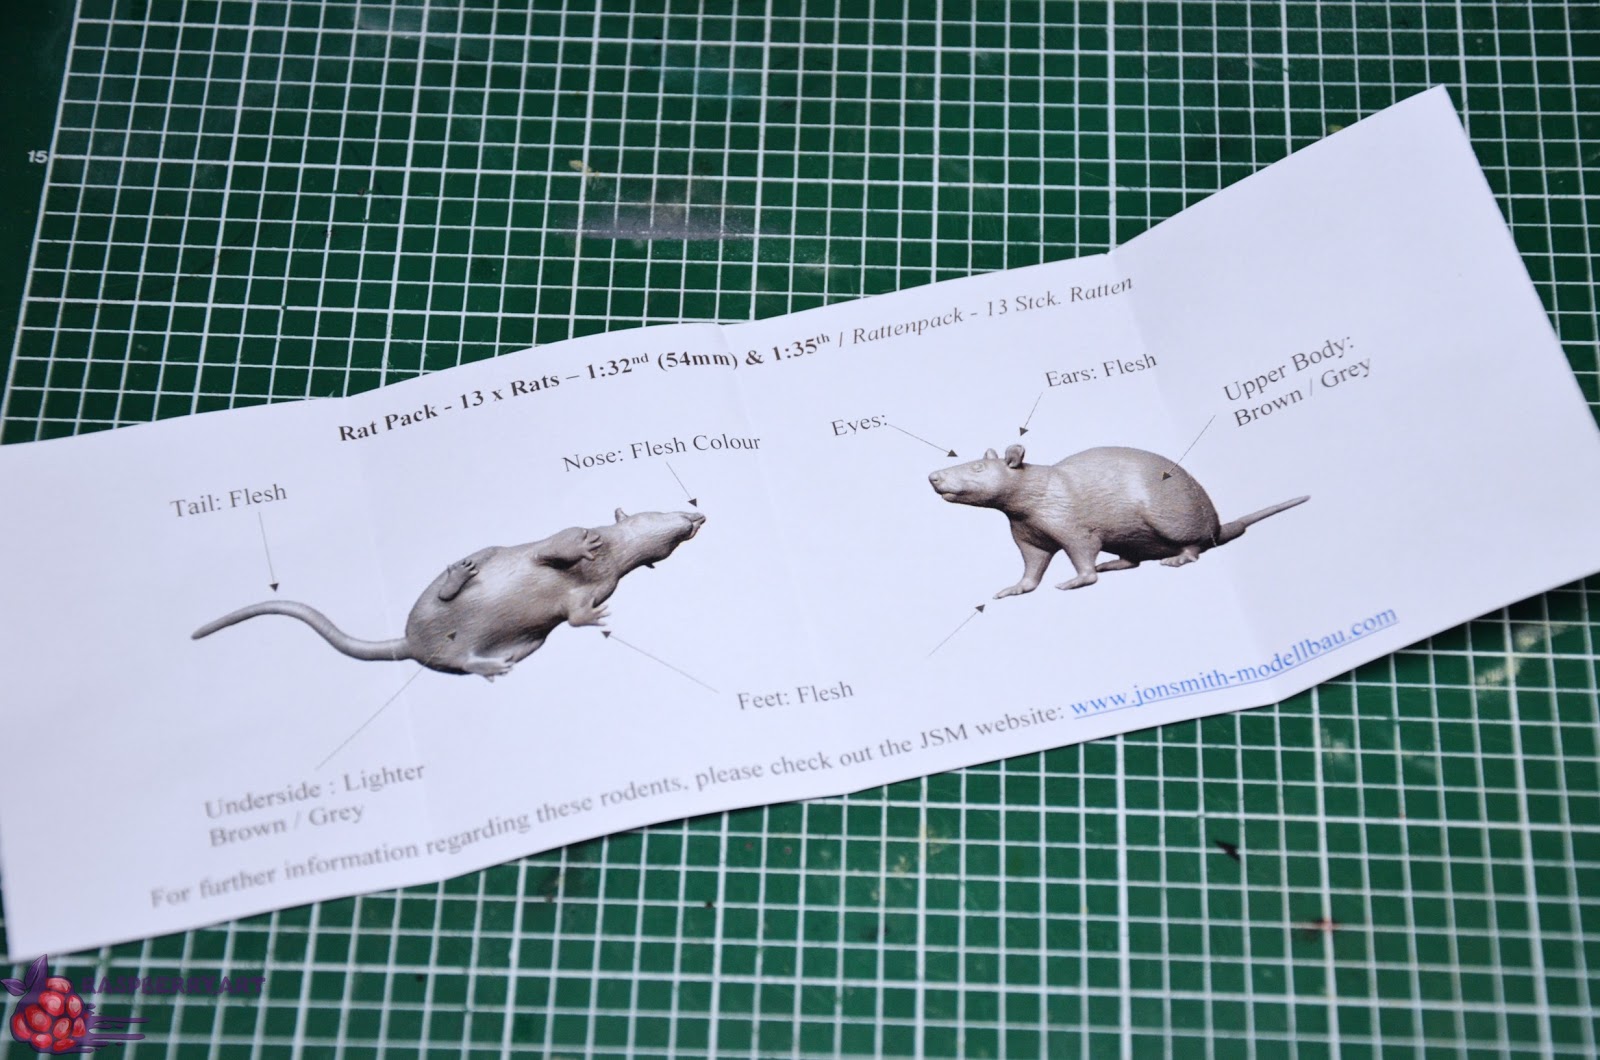


I also added a chest that was caught from the sea. It was quite annoying, because I had to glue each chain cell so that it wouldn't move, but the effect is much more interesting with this. The rats have been painted and placed in the right places. Rats were really pain in the ass...
Dodałem jeszcze skrzynie wyławianą z morza. To było dość upierdliwe, bo musiałem skleić każde ogniwo łańcuszka aby się nie ruszało, ale za to efekt jest dużo ciekawszy. Szczurki zostały pomalowane i umieszczone w odpowiednich miejscach. Oj też trochę krwi mi napsuły te maleństwa, nie powiem...

At the end it was only to create the title. I decided to put it on some kind of a treasure map. Bartek described me how to titled this project, and I only had to create it. I made the map with a milliput. Than I tried to freehand the whole map with the text. No sketch or anything.
Na sam koniec został do stworzenia tylko napis. Postanowiłem, że wkomponuje go w mapę skarbów. Bartek określił mi jaki tekst ma widnieć na pracy, a ja miałem tylko za zadanie stworzenie go. Mapę ulepiłem z miliputa, a reszta została namalowana krok po kroku. Bez żadnego szkicu czy czegokolwiek. Wystarczył wcześniej wydrukowany tekst i metodą wzrokową przenosiłem go na mapę.


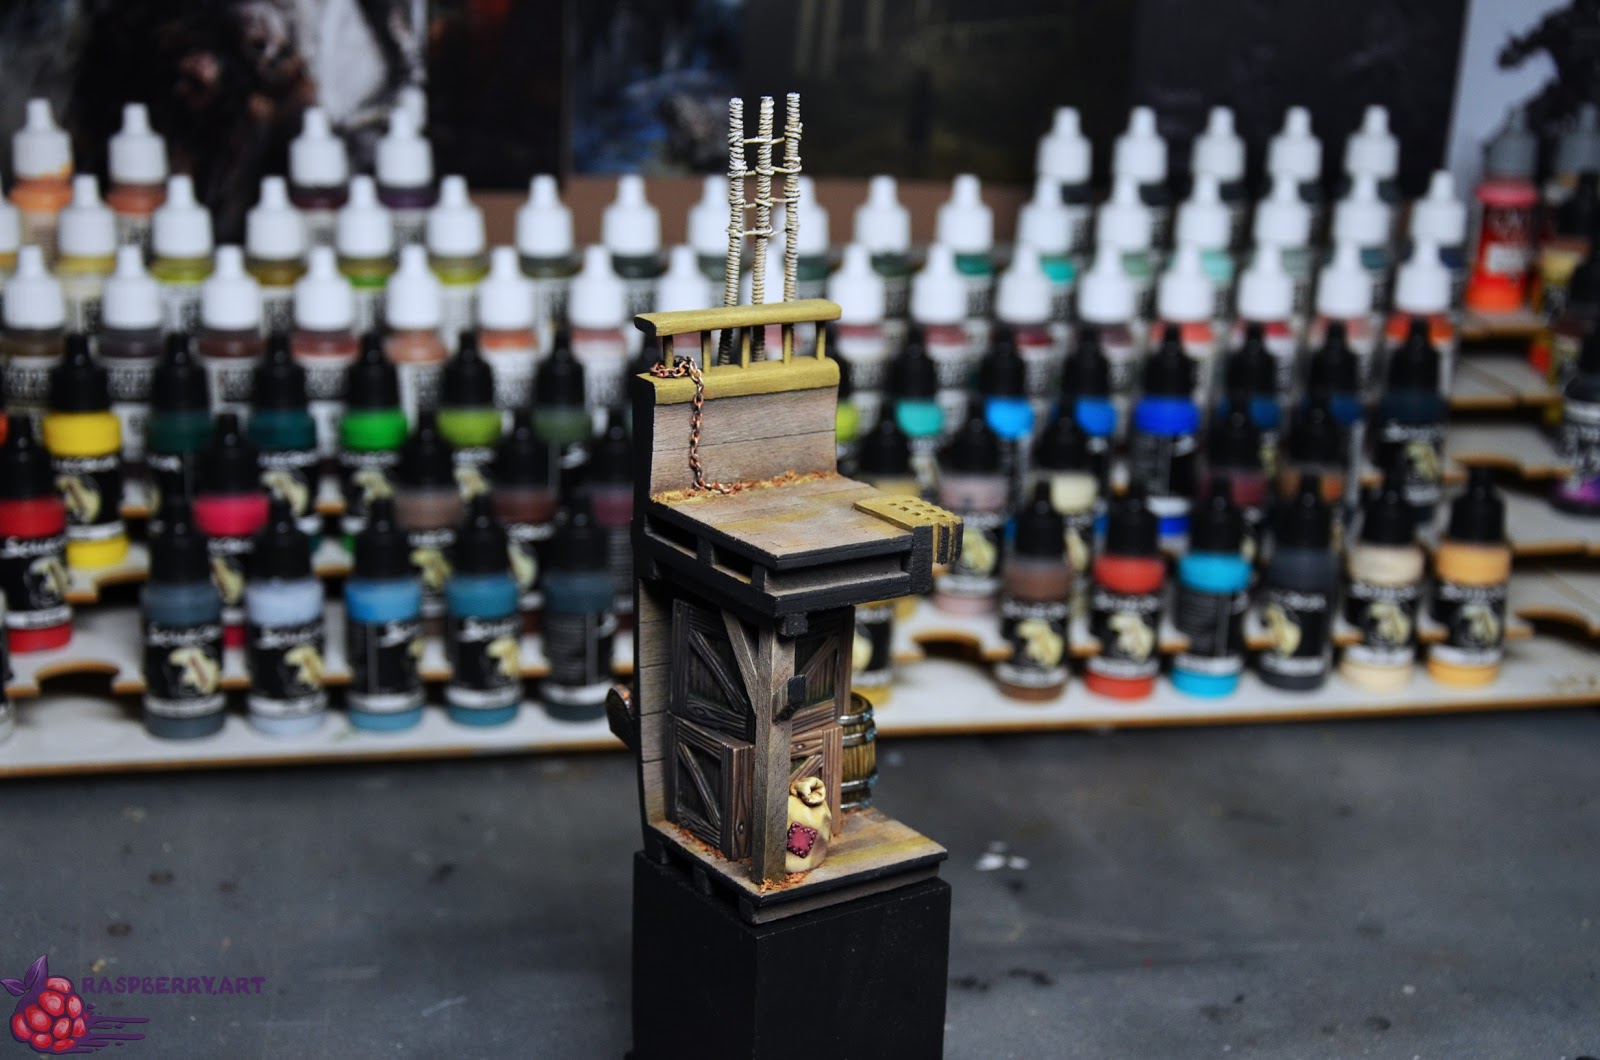
And that's how it looks. I hope that the final effect isn't the worst. It was supposed to be a simple project, but a little competition work was created.
I tak się właśnie prezentuje całość. Mam nadzieję, że efekt finalny nie jest najgorszy. Miał być z tego prosty projekt, a powstała trochę praca konkursowa.
Best regards,
Herrkuba
Translation,
Herrkuba
Comments
Post a Comment